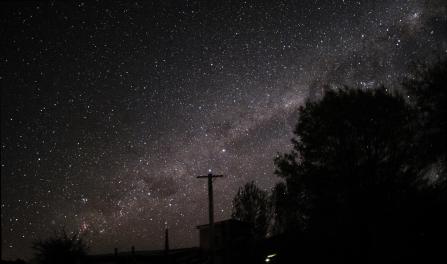
This section deals with the process of taking the images.
Tripods …
Its obvious that you need a Tripod, but not all tripods are created equal. For astrophotography the heavier and sturdier the better. Lightweight tripods have a tendency to flex and vibrate if the wind is blowing. You only need a small amount of wind to create problems, therefore its wise to choose a sheltered site if using a lightweight travel tripod. For astrophotography I use a heavy grade pan head tripod. Its a good solid mount and will take a ball head as well which is helpful when shooting at elevations directly overhead.
The best time to shoot a series of images is when your target is close to directly overhead or as close as possible, as you are then looking through the least amount of atmosphere. If your tripod cant do this you may be limited to subjects closer to the horizon and therefore more likely to suffer atmospheric degradation. Its not that you cant shoot closer to the horizon, its simply that there is a lot more atmosphere to contend with when shooting at lower inclinations. Once you have the camera attached to the tripod its time to select a target for focus checking.
Choosing a focus object….
With the camera settings all done its time to find focus. Initially set the focus to infinity so as to get as close to the point of focus, and this will make it easier to see the star initially. To do this check, select the brightest star in the night sky. The closer you can find one thats at a high elevation the better. Sirius, Rigel, the Pole Star, Achernar, Canopus are some of the best stars to use to set focus.
Aim the camera in the direction of the focus star, look along the barrel of the lens to get closer to it. At 16 mm it should be relatively easy to see the star somewhere in the LCD. When you have it in the LCD, centralise it within the focus box you will see on the LCD. Press the small vertical function wheel at the back of the camera, to zoom in and again move the star to the centre of the LCD. Slowly rack the focus ring back and forth until you see the star as a bright point of light. If focus is off the star will disappear and reappear as you do this. Aim to get the focus at the mid point between loss of focus when racking the focus in and out. It can take a little time to decide your focus is accurate. Once done press the small command wheel again to revert to normal view. I should mention at this point I dont use focus peaking as this method proves to be more accurate. Do not alter the focus after this has been done.
From time to time during your imaging session you may need to reset focus depending upon atmospheric stability.
Choosing your subject…
Now that you have obtained accurate focus, swing the camera toward your intended target and take a series of 20 second images ( typically I do a couple ) to ensure your subject is fully covered in the frame. Centralise if your are a little off target. Its important to do this as you need to allow for image shift in the frames as you take a series of images. When doing this press the shutter as you normally would, dont use the timer.
Once you have the target centred, you can take a series of 5 shots one after the other. To do this you now select the countdown timer and set it to either 2 0r 10 seconds. I usually use it set to two. Doing this now activates the camera automatically, but also makes the camera take 5 X 20 second exposures one after the other. This is why the burst mode was set to 5.6f ps and the camera now automatically takes the images in series. Its a really handy function, and one we found worked on the XT-10 as well, so it should work for all X series cameras.
Once the fist image has been completed and written to the memory card an image will be continually seen on the LCD of what you have recorded and will remain there until all files are written to the memory card.
And just like that you have 5 RAW files all set for post processing and stacking. Take as many images as you want. Just remember to take them consecutively and not at different times as this can make image stacking problematic.
Dark Frames…
I tend to shoot using the same settings for a full session and then shoot a series of 10 dark frames. To do this replace the lens cap and with the lens cap on take 10 images at the same settings as you used for the series you were working on. If you change settings make sure you repeat the dark frames process with the new settings. The reason for this will be discussed further in the image stacking process.
Record as many frames as time will allow, or the weather permit. The more data you have the more likelihood the images will be crisp when processed and stacked. The sky constantly fluctuates making some frames a little better focused than other, and the stacking program will leave out any frames it decides arent accurate enough.
And thats all you have to do for now. The next section will deal with post processing and stacking the images.
